How to Apply Decals: A Pro Step-by-Step Guide
Phase 1: Prepping the Surface
A decal is only as good as the surface it sticks to. Proper preparation is the most important step in preventing peeling and lifting later on.
Choose the Right Surface and Environment
Stick to flat, smooth surfaces like glass, finished metal or high-quality plastic. Decals struggle to adhere to heavily textured or porous materials. Additionally, aim for an idea temperature, between 50°F and 80°F (10°C - 27°C). If the surface is too hot, the adhesive becomes overly aggressive; if it’s too cold, the bond won't set correctly.
Deep Clean Without the Residue
Skip window cleaners containing ammonia, as they can leave a film that prevents the decal from bonding. Instead, use a simple mixture of rubbing alcohol and a drop of dish soap.
- Wipe the area thoroughly to remove grease, grime, and dust.
- Use a lint-free cloth to dry the spot completely.
- Wait a few minutes.
Phase 2: Perfecting Your Placement
Once the surface is ready, it’s time to line things up. Accuracy at this stage prevents the frustration of a crooked decal.
Mark Your Spot
Use a pencil or a piece of masking tape to mark exactly where you want the corners of your decal to sit. For large window decals or vehicle lettering, using a level is a smart move to ensure everything is perfectly horizontal.
Create a Hinge
Instead of peeling the whole backing off at once, tape the top edge of the decal to your surface using masking tape. This creates a hinge, allowing you to flip the decal up, remove the backing and drop it back down into the exact position you marked.
Phase 3: The Application
This is where the magic happens. Slow and steady is the name of the game.
Peel and Lower
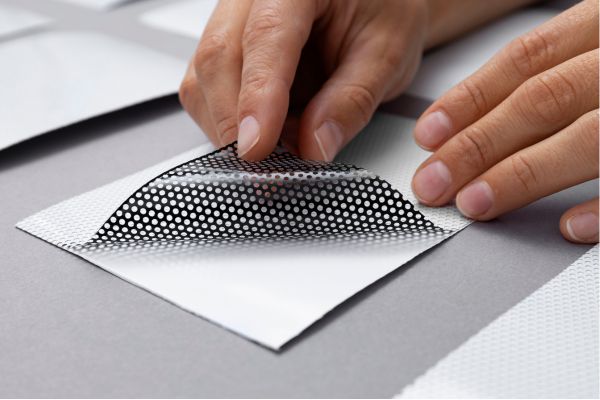
Flip the decal up on its tape hinge and carefully peel away the paper backing. Once the adhesive is exposed, slowly lower the decal onto the surface from the top down.
Use a Squeegee for a Professional Bond
Avoid using your bare hands, as finger oils can affect the edges. Use a professional squeegee (or a plastic credit card in a pinch) to press the decal onto the surface.
The technique: Start from the center and move outward toward the edges. This pushes any trapped air out rather than sealing it in. Apply firm, consistent pressure to ensure the permanent adhesive makes full contact with the surface.Phase 4: The Big Reveal
The final step is the most satisfying, but don't rush it.
Remove the Transfer Tape
Carefully peel back the top clear lining (the transfer tape) at a sharp angle — aim for 180 degrees, pulling it back against itself. If any part of the decal starts to lift with the tape, stop, lay it back down and give it another firm pass with the squeegee before trying again.
Final Check
Once the tape is gone, give the edges one final, gentle press to ensure everything is sealed. If you spot a tiny bubble, don't peel the decal up. Instead, use a pin to poke a microscopic hole in the bubble and use your finger to push the air out.
Choose the Right Material for Your Job
: Great for outdoor use, car windows, and long-term branding.Clear decals: Ideal for storefronts where you want the design to pop without a visible background.Matte or gloss finishes: Choose matte for a modern, sophisticated look or gloss for high-impact, vibrant colors.Looking for the perfect custom design? Explore our full range of custom decals and start your project today.